https://www.digicert.com/es/instalar-certificado-ssl-iis-7.htm
Mes: enero 2019
Crear un servicio windows .NET Standard
https://dzone.com/articles/create-windows-services-in-c
Create Windows Services in C#
IN this post, we go over how to get started using C# and .NET by creating a basic Windows service with these technologies.
by Faisal Pathan · Jul. 09, 18 · Web Dev Zone · TutorialLike (3)
Comment (0) Save Tweet 63.73k Views
Join the DZone community and get the full member experience.JOIN FOR FREEJumpstart your Angular applications with Indigo.Design, a unified platform for visual design, UX prototyping, code generation, and app development.
Here I’m going to explain Windows Services in C# .NET.
- Introduction of Windows Services.
- How to create Windows Services in C# .NET.
Introduction
Windows Services normally start when the OS boots and runs an application in the background. Windows Services executes applications in its own session. It either starts automatically or we can manually pause, stop, and restart it.
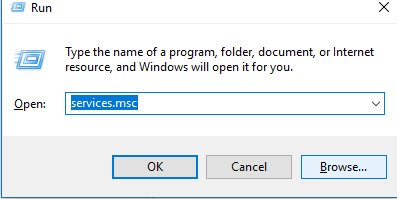
You can find services in the following ways
- Go to Control Panel select “Services” inside “Administrative Tools.”
- Open Run window (Window + R), type in services.msc, and press enter.
How to Create Windows service
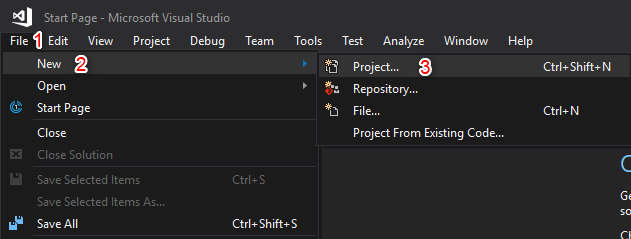
Step 1
Open Visual Studio, go to File > New and select Project. Now select a new project from the Dialog box and select “Window Service” and click on the OK button.
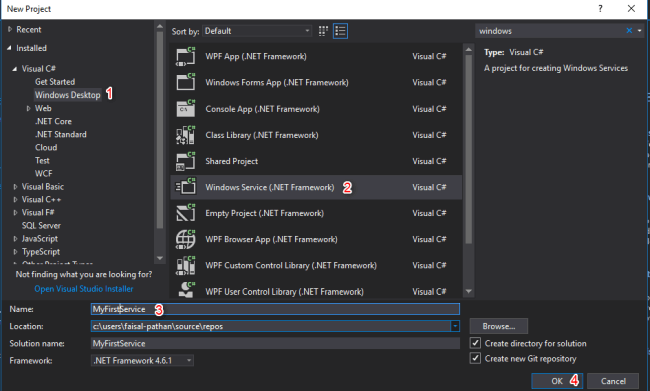
Step 2
Go to Visual C# -> ”Windows Desktop” -> ”Windows Service,” give your project an appropriate name and then click OK
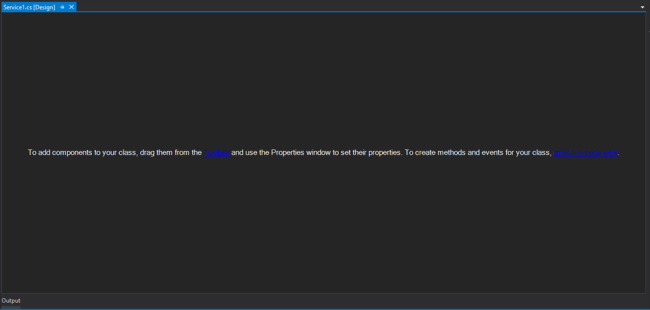
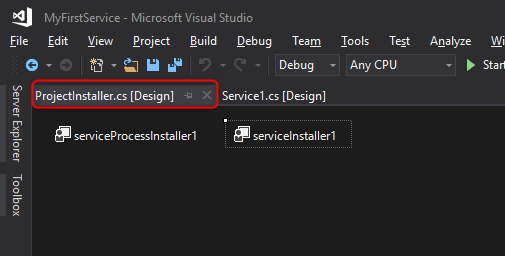
Once you click OK, the below screen will appear, which is your service
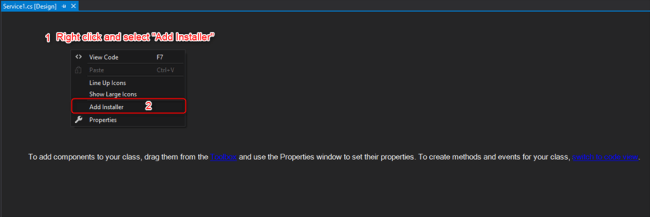
Step 3
Right-click on the blank area and select “Add Installer.”
Adding Installers to the Service
Before you can run a Windows Service, you need to install the Installer, which registers it with the Service Control Manager.
After Adding Installer, ProjectInstaller will add in your project and ProjectInstakker.cs file will be open. Don’t forget to save everything (by pressing ctrl + shift + s key)
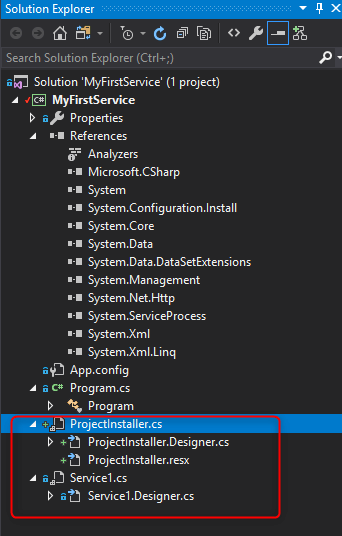
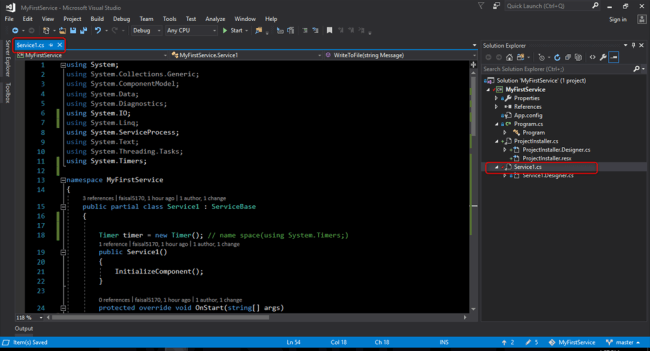
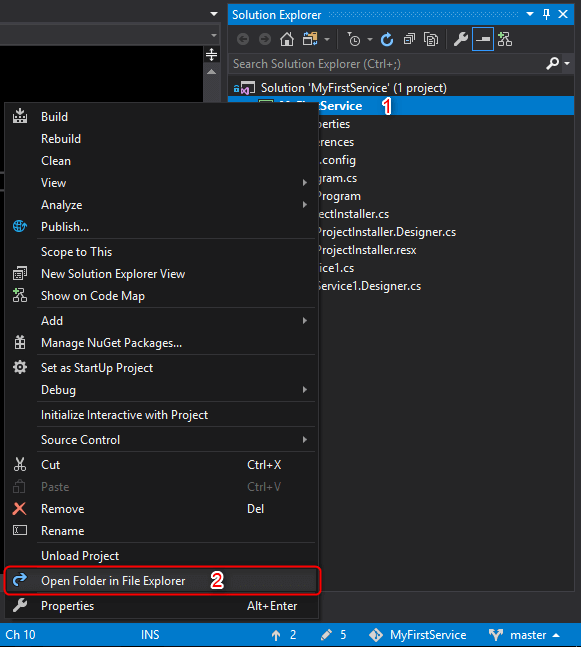
The Solution Explorer looks like this:
Step 4
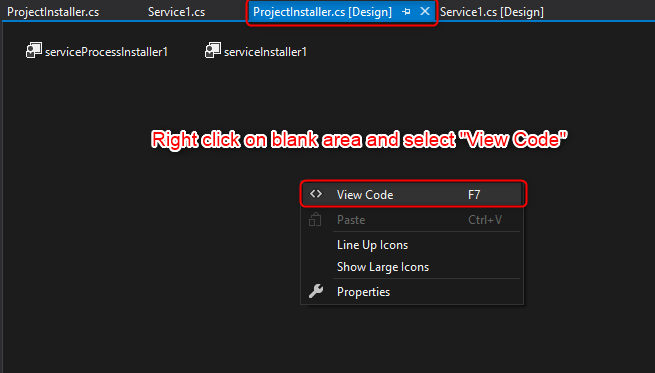
Right click on blank area and select “View Code”
Step 5
Its has a Constructor, which contains the InitializeComponent method.
The InitializeComponent method contains the logic which creates and initializes the user interface objects dragged on the form’s surface and provides the Property Grid of Form Designer.
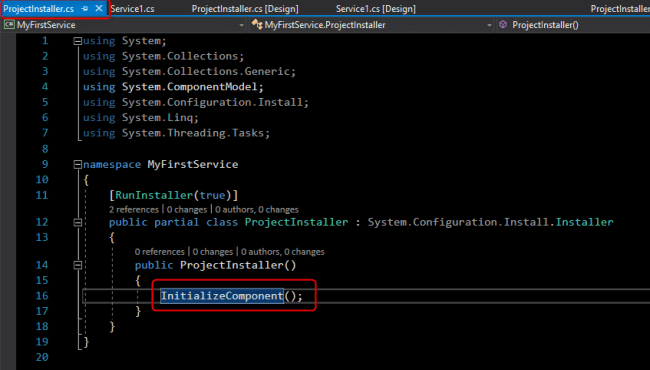
Very important: Don’t ever try to call any method before the call of InitializeComponent method.
Step 6
Select the InitializeComponent method and press the F12 key to go the definition.
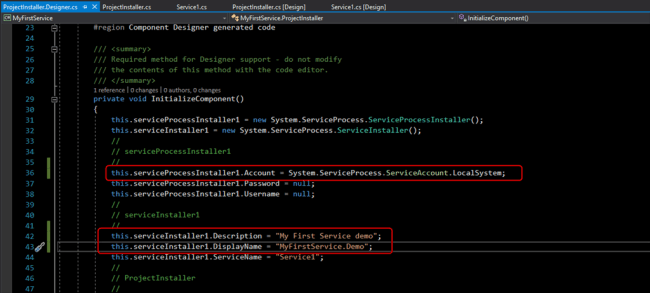
Step 7
Now add the below line while installing the service:
this.serviceProcessInstaller1.Account = System.ServiceProcess.ServiceAccount.LocalSystem;
You also can add a description and display the service name (optionally).
this.serviceInstaller1.Description = "My First Service demo";
this.serviceInstaller1.DisplayName = "MyFirstService.Demo";
Step 8
In this step, we will implement a timer, and code to call a service at a given time. We will create a simple write in a text file.
Code explanation – the above code will call a service every 5 seconds and create a folder if none exist and write our message.
Service1.cs class
using System;
 using System.Collections.Generic;
 using System.ComponentModel;
 using System.Data;
 using System.Diagnostics;
 using System.IO;
 using System.Linq;
 using System.ServiceProcess;
 using System.Text;
 using System.Threading.Tasks;
 using System.Timers;
 namespace MyFirstService {
     public partial class Service1: ServiceBase {
         Timer timer = new Timer(); // name space(using System.Timers;)
         public Service1() {
             InitializeComponent();
         }
         protected override void OnStart(string[] args) {
             WriteToFile("Service is started at " + DateTime.Now);
             timer.Elapsed += new ElapsedEventHandler(OnElapsedTime);
             timer.Interval = 5000; //number in milisecinds
             timer.Enabled = true;
         }
         protected override void OnStop() {
             WriteToFile("Service is stopped at " + DateTime.Now);
         }
         private void OnElapsedTime(object source, ElapsedEventArgs e) {
             WriteToFile("Service is recall at " + DateTime.Now);
         }
         public void WriteToFile(string Message) {
             string path = AppDomain.CurrentDomain.BaseDirectory + "\Logs";
             if (!Directory.Exists(path)) {
                 Directory.CreateDirectory(path);
             }
             string filepath = AppDomain.CurrentDomain.BaseDirectory + "\Logs\ServiceLog_" + DateTime.Now.Date.ToShortDateString().Replace('/', '_') + ".txt";
             if (!File.Exists(filepath)) {
                 // Create a file to write to.
                 using(StreamWriter sw = File.CreateText(filepath)) {
                     sw.WriteLine(Message);
                 }
             } else {
                 using(StreamWriter sw = File.AppendText(filepath)) {
                     sw.WriteLine(Message);
                 }
             }
         }
     }
 }
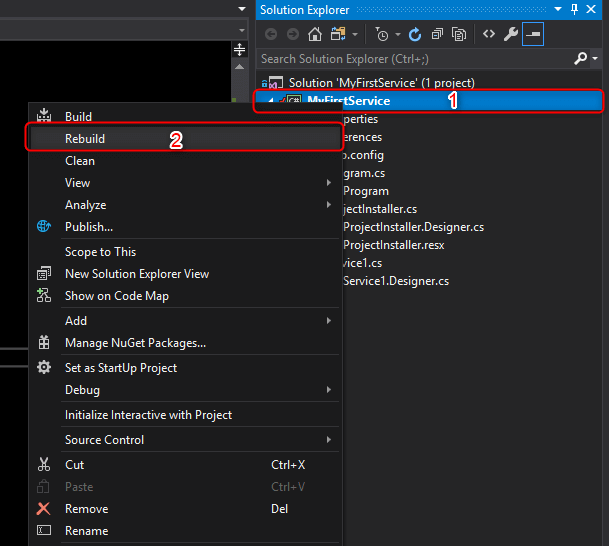
Step 9: Rebuild Your Application
Right-click on your project or solution and select Rebuild.
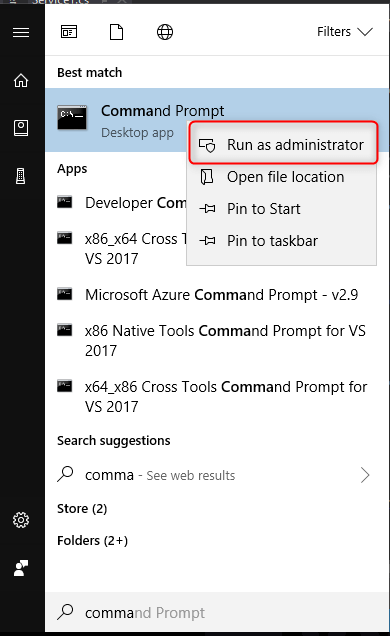
Step 10
Search “command Prompt” and run the program as an administrator:
Step 11
Fire the below command in the command prompt and press Enter.
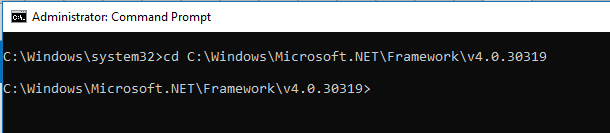
cd C:\Windows\Microsoft.NET\Framework\v4.0.30319
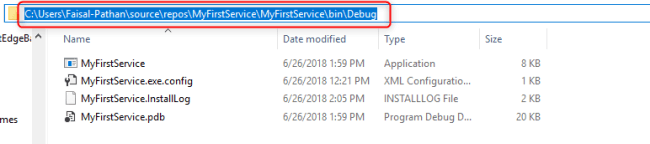
Step 12
Now Go to your project source folder > bin > Debug and copy the full path of of the Windows Service.exe file
Step 13
Open the command prompt and fire the below command and press enter.
Syntax
InstallUtil.exe + Your copied path + \your service name + .exe
Our Path
InstallUtil.exe C:\Users\Faisal-Pathan\source\repos\MyFirstService\MyFirstService\bin\Debug\MyFirstService.exe
Step 14
Open services by following the below steps:
- Press Window key + R.
- Type services.msc
- Find your Service.

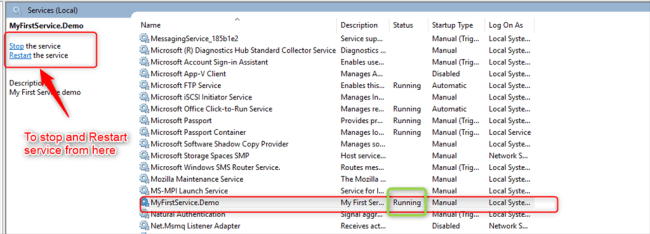
Service Output
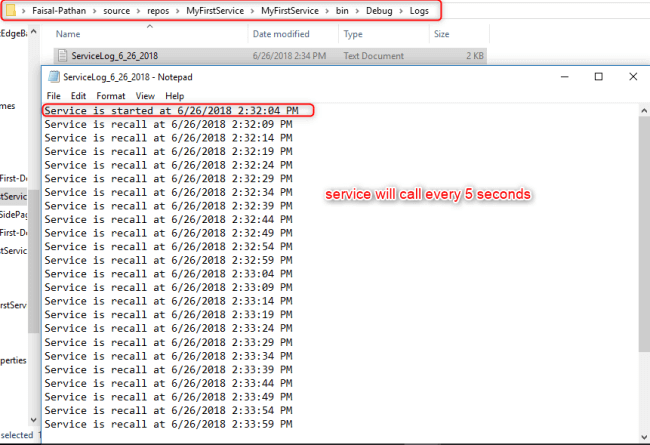
A log folder will be created in your bin folder.
If you want to uninstall the service, fire the below command.
- Syntax InstallUtil.exe -u + Your copied path + \your service name + .exe
- Our path InstallUtil.exe -u C:\Users\Faisal-Pathan\source\repos\MyFirstService\MyFirstService\bin\Debug\MyFirstService.exe
Summary
In this article, we learned how to create a Windows Service and install/uninstall it using the InstallUtil.exe from a command prompt.
I hope that I have explained each step clearly and that it can be easily understood by all developers. You can leave feedback/comments/questions to this article. Please let me know if you like and understand this article and how I could improve it.
I also uploaded this project on GitHub, here.